Service Update: Wintex 1000s, 2000, & 3000 Models
- December 28, 2022
- Blog, Maintenance
- Posted by Felix.Weber
- Comments Off on Service Update: Wintex 1000s, 2000, & 3000 Models
On occasion a client has called about a sticking probe, or a probe stuck in the ground. There are several possible causes of this including soil conditions. Below are steps to manually raise the probe up, along with some potential causes.
For any sensor issue, clean off sensor first. There might be some metal suck to the sensor (magnetic) giving false readings.
Stuck probe:
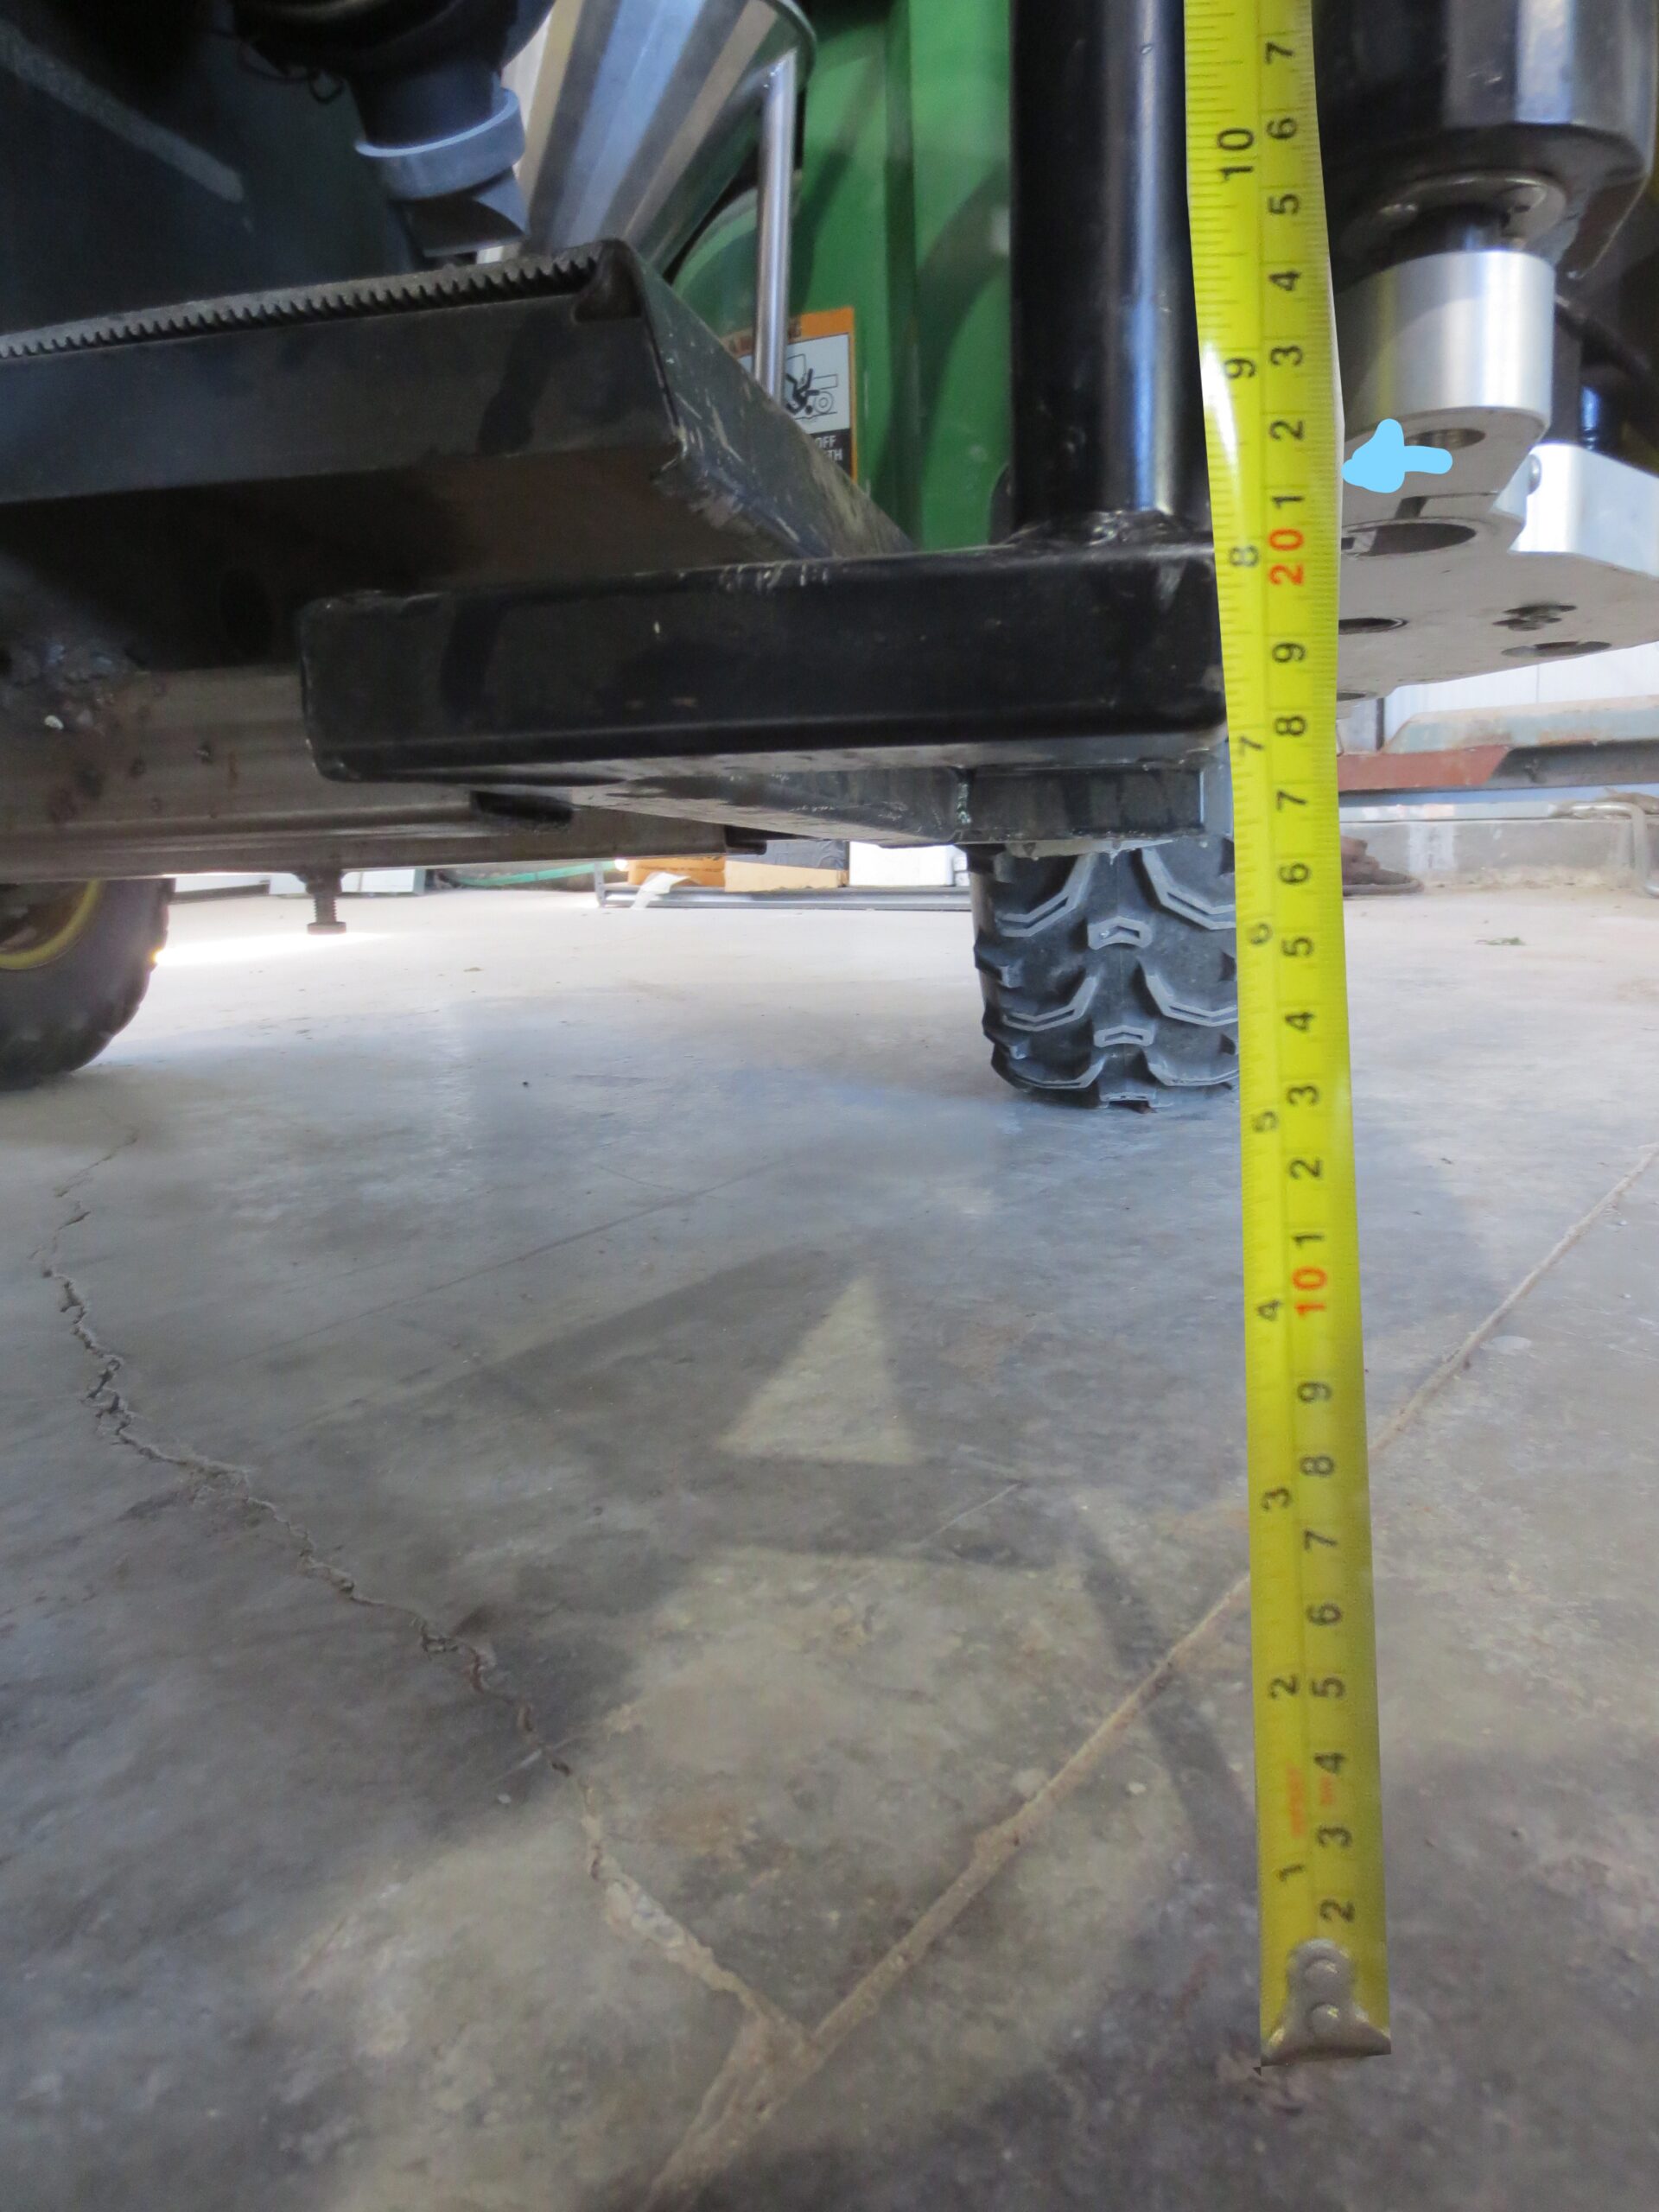
- Mounting height: The proper footplate height is 8 to 9 inches off the ground when the footplate is fully retracted. When the footplate does not rest on the soil, the Wintex can shift the changing angle of the probe when going down or up, which can cause the probe to become stuck, or causing excessive wear. It is important your vehicle not shift while sampling, which can cause the probe to become stuck
On trucks using our truck box frame: Adjust the mounting height of the Wintex on the truck box frame by removing the pins at each side of the frame and raising or lowering using the to one of the other holes.
- Lubricate the Probe: The probe has two points that require daily/regular lubrication. Include this in your daily walk around (Video). Instruction .doc
Manually Using the Hydraulics to Pull the Probe Up
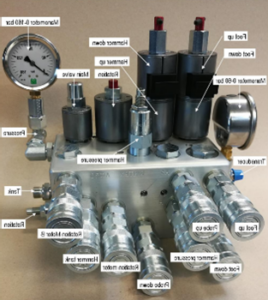
The hydraulics can be operated manually using the controls on the hydraulic block.
- Activate the probe rotation by pressing down the red rotation valve button to release (the lock pin will come up a bit). Turn the button counter-clockwise to activate probe rotation.
- Locate the hammer/probe valve. The probe goes down when pulling the valve up. The probe goes up when pushing the valve down. At the same time always activate the main valve by pressing it down when activating the other functions.
- Never lift the foot off the soil surface while the probe is in the ground. This can change the angle of the probe.
- Remember to re-set (lock) the rotation valve before continuing to sample
Probe not Rotating:
- Loose damaged or poor wire connection to the Solenoid on the rotation hydraulic valve.
- Damaged sensor
- Dirt stuck in rotation valve. Can be prevented by regular hydraulic Oil and filter change.
Solution:
- Check sensor: sensor light (with metal on off). Check monitor for voltage as per manual.
- Check tightness of solenoid plug, open plug and reconnect, check for corrosion.
- Reverse the two hoses for probe rotation marked A3 – B3 on Hydraulic block to flush any dirt particles back in tank. Reconnect the hoses to original setting.
Hammer has little/no pressure or acts irregularly.
- Check for visual leaks, and the level of hydraulic oil in the reservoir
- The hammer pressure accumulator pressure may be low, or defective. Ag Business & Crop has equipment to test and recharge your accumulator, which we will do at no cost. Ship your accumulator to us with a return label. Have your accumulator serviced annually. The main reason why an accumulator will loose pressure is large temperature changes. This generally happens when equipment is stored in non heated area over winter.
Our Shipping Address:
Ag Business & Crop Inc.
1-131 Frank Lambier Crt. Palmerston, Ont. N0G 2P0
- Impurities or dirt particle build-up in hammer-head. This happens over time if the Oil and filter is I not regularly replaced. Change fluid and filter at recommended interval and at-least ones a year.
- regular hydraulic pump service with oil and filter change.
Damaged lock pins on the Pickup frame.
- Install the pins on the frame without the lock nut so the pin goes in further with less or no gap between the locking hole and pin.
A bent pin means too large of a gap. There is a lot of force needed to shear off a pin.
- If the rolling frame is too loose, either replace the plastic rollers or use a washer to push the Wheel out and stabilize it more.
- Tilting pin: The hitch bolt must be reasonably tight and plates tight on the pin side, so there is no gap between the plates to reduce the risk of bending the pin.
